How To Switch Web Hosts - Slayhost.com - Webmasters - Nairaland
Nairaland Forum / Science/Technology / Webmasters / How To Switch Web Hosts - Slayhost.com (321 Views)
Top Web Hosts In Nigeria / Best Local (Nigerian) Web Hosts 2018 / Which Company Hosts Nairaland ? (2) (3) (4)
(1) (Reply)
| How To Switch Web Hosts - Slayhost.com by slayhost: 1:56pm On May 22, 2018 |
Allow me to take a shot at a scenario you may be in: You’ve built a website for your business and decided a hosting provider that meets your needs in terms of bandwidth, storage, backups, support and more. Over time you become frustrated with your hosting provider at lack of support or technical competence to fulfill your needs. When you started with your web host it may have seemed like the ideal option, now that things have changed it’s time to move to a new web host. If this accurately describes where you are, here’s how you can do it seamlessly. How to change your web host smoothly? Step 1 – Take your website’s backup It’s really important to take a backup of your website to be double sure to avoid any loss of data before you change your provider. Unexpected scenarios might result in loss of crucial files that could hurt your business while making the switch. Step 2 – Make note of all your system settings Before you change your web host, record and save all important settings like softwares you use and their configurations along with your security settings and email settings. Step 3 – Choose your new provider In order to ensure you don’t have to repeatedly switch your web hosting provider, you must take your time and do your research. See who matches your needs the best. Keep in mind other products you might need over time as your business grows and whether your potential web host would provide for the same. Step 4 – Inform your website visitors Switching your web host is not that painful. Let your customers know in advance about any downtime you might face. They might assume you have disappeared randomly and would question the legitimacy of your business. A good idea is to load your website files on your new provider’s IP address before you make the switch. Step 5 – Change your DNS records The most crucial step of this process is to correctly update the A records of your domain name on the nameservers provided by your new web host. Ideally, you should do this before you migrate completely to face minimum downtime. This process might take up to 2 days considering your older domain provider and web host company is the same. Step 6 – Delete your account with your old web host Once you have done the necessary checks and validations and you’re convinced everything is working fine, you can delete your account and cancel your package with your old hosting provider. Changing your web host is not very complicated however there are a few things you should promptly look out for: – Downtime while making the switch – All your web files and web pages are successfully hosted with the new provider (For example – no broken images or missing pages with a 404 error). – Transferring your emails in case they are a with a third party like Microsoft 365 – Database corruption that might occur when you switch – cPanel – Restore your Database backup While most of these issues are easy to troubleshoot and if you take precautionary measures you can minimise/avoid them entirely. However, let me elaborate a little on the cPanel backup and restore Here’s how you backup and restore your cPanel account when you switch your web host 1.Download your backup from your current host 2.Restore those backups with your new host 3.Preview your website and check if everything is working To Backup your website: . Login to your cPanel account -> Backup Wizard -> Backup . Home Directory MySQL Databases (Select your databases) – Download Restoring your website would include steps laid down by your new web host. It would require you to go to your cPanel account -> Manage -> Backup Wizard -> Restore -> Home Directory – Upload. 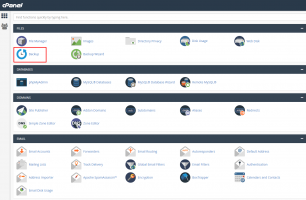 To Restore your cPanel Linux Hosting package at SlayHost Login to your Control Panel, Search for the domain name for which you have purchased this Hosting Order and go to the Order Information view. 1. Click the Manage Web Hosting link. 2. On the Home page, under the Files section, click Backups and proceed to restore both the Home Directory and MySQL database backups. Preview your website from cPanel itself and make sure everything is working fine and your website files are loading correctly. 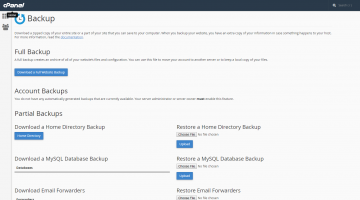 Conclusion Switching your web host does not require technical knowledge. Although intimidating in the start, it’s actually pretty simple if you follow the steps mentioned above. Watch out for problems that might occur in the process and don’t forget to Backup and Restore your cPanel Databases. Note: This illustration is taking from slayhost.com web hosting cpanel |
(1) (Reply)
Own Your Free Website Today. / I Want To Buy $100 F & F Paypal Fund / 5 Reasons Why You Should Get A Google My Business Page For Your Business
(Go Up)
| Sections: politics (1) business autos (1) jobs (1) career education (1) romance computers phones travel sports fashion health religion celebs tv-movies music-radio literature webmasters programming techmarket Links: (1) (2) (3) (4) (5) (6) (7) (8) (9) (10) Nairaland - Copyright © 2005 - 2024 Oluwaseun Osewa. All rights reserved. See How To Advertise. 15 |