Atnerjennac24's Posts
Nairaland Forum / Atnerjennac24's Profile / Atnerjennac24's Posts
(1) (2) (3) (4) (5) (6) (7) (8) (9) (10) (of 10 pages)
Welcome to our comprehensive guide on getting started in beekeeping! If you're considering starting this rewarding hobby in your backyard, you've come to the right place. In this article, we will provide you with all the essential information to begin your beekeeping journey successfully. From assembling your beekeeping starter kit to choosing the best beehives, we've got you covered. Why Choose Beekeeping? Before we dive into the details of getting started, let's briefly touch on why beekeeping is a fantastic choice. Beekeeping not only allows you to contribute to the environment by supporting pollination but also offers various personal benefits. It can be an educational and therapeutic experience, fostering a deeper connection with nature. Additionally, you can enjoy delicious and healthy honey produced by your bees and even explore the potential for earning extra income from hive products. Understanding the Basics of Beekeeping 1. Research and Learning To embark on a successful beekeeping journey, the first step is to educate yourself about these incredible insects. Engage in thorough research, read books, attend workshops, and join local beekeeping associations. Understanding the behavior, needs, and life cycle of bees is essential in providing them with a healthy and nurturing environment. 2. Assembling Your Beekeeping Starter Kit Before you start your beekeeping adventure, you'll need to acquire a beekeeping starter kit that includes all the necessary equipment. A well-prepared beekeeping kit will set you on the right path to becoming a successful beekeeper. Here are the key components to consider: Hive Components Hive Bodies: The primary structure where the bees will live and build their comb. The most commonly used types are Langstroth, Top-Bar, and Warre hives. Frames and Foundation: Frames provide structural support for the comb, and foundation sheets guide bees in building straight and uniform comb. Lids and Bottom Boards: Lids protect the hive from the elements, while bottom boards serve as the hive's entrance and exit. Protective Gear Bee Suit: A full-body bee suit with a veil and gloves is essential for protecting yourself from potential stings. Smoker: A smoker is used to calm the bees during hive inspections, making the process safer and more manageable. Tools Hive Tool: This indispensable tool helps in prying apart hive components and scraping off excess propolis and wax. Bee Brush: A soft-bristled brush comes in handy for gently moving bees during hive inspections. 3. Choosing the Best Beehives Selecting the right beehive is a critical decision that can impact the success of your beekeeping venture. Each type of beehive has its advantages, so consider your preferences and the local climate. Here are the most popular types: Langstroth Hive The Langstroth hive is the most widely used beehive and is ideal for beginners. It consists of stackable boxes with removable frames, allowing for easy inspection and honey harvesting. Its versatility and compatibility with standard beekeeping equipment make it a top choice. Top-Bar Hive Top-bar hives have bars instead of frames, and bees build their comb downward. They offer a more natural approach to beekeeping and are simpler to manage, making them suitable for those who prefer a less intrusive method. Warre Hive Warre hives mimic the natural living conditions of bees, providing a vertical and more compact space for the colony. They are low-maintenance and offer a hands-off approach to beekeeping. Installing Bees in the Hive With your beekeeping starter kit and beehive ready, it's time to install the bees into the hive. Follow the instructions provided with the bee package or nucleus colony diligently. Handle the bees with care and confidence, ensuring a smooth transition to their new home. Hive Management and Maintenance Beekeeping is a year-round responsibility that requires regular management and maintenance. Throughout the seasons, you'll need to conduct hive inspections, monitor the hive's population, honey reserves, and look out for signs of diseases or pests. Proper management is vital to ensure the health and productivity of your colony. Conclusion Congratulations! You are now well-equipped with the knowledge to kickstart your beekeeping journey. We covered the basics of beekeeping, assembling your beekeeping starter kit, and selecting the best beehives to ensure you have the best possible start in this fulfilling hobby. Remember, beekeeping is an ongoing learning process, and with dedication and care, you'll be rewarded with a thriving hive and delicious honey.
|
So, despite it being January, when every man and his dog are dieting, I CAN’T STOP BAKING! It’s so therapeutic and has the best reward (or worst if you’re on said diet!) so, I thought I’d come to a compromise and instead of a delicious cake I would share a ‘healthier’ recipe. This has to be one of the simplest granola’s out there and is a prefect breakfast accompaniment, sprinkled over porridge or atop a nice bowl of yoghurt and fruit. Or, if you’re like me, it makes a great snack when eaten dry! Ingredients; 1.5 tbsp Coconut Oil 4 tbsp Honey 2 tbsp Maple Syrup 1 tsp Vanilla Extract 250g Jumbo Rolled Oats 30g Puffed Rice (eg. Rice Krispies) 60g Cashew Nuts 30g Peanuts 30g Walnuts 60g Raisins 60g Dried Cranberries Method; Preheat the oven to 160°C/140°C fan and line a large baking tray with parchment paper. Add the Coconut Oil, Honey and Maple Syrup to a pan and heat on a medium heat until the oil has melted and all three are combined, then remove from the heat. Add all the dry ingredients (Except the fruit) to a bowl and mix together, then pour over the wet ingredients from the pan and the vanilla extract before stirring well to ensure everything is equally wet and evenly distributed. Pour the mixture onto the baking tray and spread evenly. Cook for around 10 minutes at 160°C for chewy granola, or an extra 5 minutes if you like it more crunchy!. Break up any larger pieces and then pop in a jar (& try and resist until breakfast!). I hope this isn’t too detrimental to any diet you may be on! (and if you aren’t dieting then go wild! I’ll maybe put some naughtier recipes on next week!). See Also: Mars Bar Krispie Squares
|
When your house is full of choc the only thing you can do is make sweet treats, right? I’ve been sitting on this recipe for a while now but seen as my MIA status isn’t yet over (give me a month and uni will be HISTORY!) I’ve just not had chance to write up the post and share it with you. SO, here’s an extra Easter treat for you lovelies… INGREDIENTS: 550g White Chocolate 100g Rich Tea Biscuits 100g Pink Wafer Biscuits 200g Mini Eggs 125g Mini Marshmallows METHOD: 1. Melt 450g of White Chocolate either in a microwave at 30 second intervals or over a double boiler 2. Add the biscuits to a sandwich bag and hit with a rolling pin/ something similarly heavy (a bottle of wine or a tin of beans usually does the trick!) until they are broken up into large chunks, then add to the melted chocolate 3. Add 150g of Mini Eggs to a food bag and do the same- they’re a lot easier to bite into when they’ve been bashed about a bit- then add to the chocolate and biscuits 4. Finally add 100g marshmallows to the chocolate and mix everything together thoroughly 5. Line a 20cm/8in baking tin with clingfilm 6. Add the mixture to the tin and press down firmly 7. Melt the remaining 100g chocolate and then pour over the top of the rocky road and spread out to leave a thin layer of chocolate on top, before sprinkling the remaining mini eggs and marshmallows over the top 8. Refrigerate until set, this shouldn’t take more than a couple of hours, Top Tip- before cutting up allow the block to reach room temperature and your job will be a lot easier! I feared this might be a little late in the game for Easter treat recipes BUT who doesn’t love to buy half price mini eggs?! Plus, it’s a perfect way to use them up if you don’t want them hanging round the house for too long! Let me know if you have any other Easter treat ideas you’d like me to have a go at, I’ve got 12 months to get creating! I hope you’ve all had a fabulous Easter weekend and managed to get some me time in! Head on over to my Insta story if you want to see what I’ve been up to! Read more: Strawberries and Cream Cupcakes Recipe 1 Like 1 Share
|
SPRING IS IN THE AIR PEOPLE! I am so glad that we are finally getting more sun than rain it, it has such an uplifting effect on my mood (probably jinxed it now, damn it !) I know so many people give up chocolate for lent, what with Easter being a homage to all things chocolate egg so I’m bringing you another 0 chocolate bake. (OK I lied, it is 100% chocolate, but it’s white chocolate so that almost doesn’t count?) All Hail the WHITE CHOCOLATE BROWNIE, or Blondie, as they are formally known. I have been working on creating a solid (as in reliable, delicious, trustworthy- not solid as in you’ll lose your teeth to a bite) Blondie for a while. Good news Ladies & Gents, I think I’ve cracked it! They were shipped around to a whole manner of people for approval and the feedback was top notch so here we have it, my *Ultimate* White Chocolate Blondie… INGREDIENTS 200g White Chocolate 100g Butter 2 Large Eggs 100g Soft Light Brown Sugar 80g Golden Caster 50g Demerara 1 Tsp Vanilla Extract 150g Plain Flour 1 tsp Baking Powder 80g Pecans 75g Dried Cranberries METHOD Preheat the oven to 180 °C/160 °C fan Melt half of the white chocolate together with the butter over a double boiler Remove from the heat and add the sugars Sift the flour and baking power together, then add to the mix, stirring well to combine Set the mixture aside to cool slightly, chopping the pecans and the remaining white chocolate into chunks in the mean time Once the mixture has cooled to room temperature, add the eggs and vanilla extract and mix well Finally add the chopped pecans, cranberries and the white chocolate chunks to the mixture and ensure they are evenly distributed Grease and line a baking tin, then add the Blondie mixture. Pop into the oven for 30-35 minutes, until the mixture is lightly golden doesn’t wobble when shaken Remove from the oven and set-aside until cool, then cut into pieces! Please let me know if you give these a go & what you thought, I’m always looking to improve on my recipes & develop new ones so let me know if there’s anything else you want me to have a go at! P.S. Putting this post together has got me craving them sooo bad, going to have to think up an excuse to get baking! See Also: Jammie Dodger Blondie Recipe
|
This article explains Coronaviruses and how they are transmitted from humans to animals. It also discusses the symptoms and prevention. It also discusses the SARS-CoV-2 virus, which causes COVID-19. This disease is caused by the SARS-CoV-2 virus and can be transmitted to humans and animals. If your dog has experienced these symptoms, it's important to contact your veterinarian as soon as possible. Coronaviruses are transmitted from humans to animals. Coronaviruses are a large family of viruses that can affect many different animals, including humans. They typically affect the digestive and respiratory systems. They are highly transmissible and cause various illnesses in different animals. Coronaviruses are most commonly transmitted from humans to animals but can also be transmitted from animal to human. Coronaviruses infect various species of domestic and wild animals, including bats and humans. In addition to humans, coronaviruses have been found in dromedary camels and palm civet cats. Prevention There are several steps you can take to help prevent the spread of COVID in dogs. The first step is to make sure you are wearing gloves when you handle your pet. It is also important to wash your hands after touching your pet. You should also avoid touching your pet's face or other exposed areas, and avoid touching your pet with disinfectant wipes or face masks. When you notice any symptoms in your pet, contact your veterinarian immediately. Most cases of COVID-19 are mild and can be treated at home, but there are times when your pet needs to be treated in a veterinarian's office. Vaccination is also an effective way to protect your dog from the disease. There are different types of vaccines for COVID, and the one you choose for your dog will depend on its lifestyle and other factors. Symptoms COVID is a virus that can cause many different symptoms. If you have symptoms of COVID, you should see your doctor immediately. However, you should know that these symptoms can also result from other illnesses. The best way to find out if you have COVID is to contact your primary care provider. Your doctor can explain the symptoms and help you decide if you have the virus. The symptoms of COVID include fever, anosmia, ageusia, and cough. These highly specific symptoms have a positive predictive value (PPV). These symptoms were confirmed through robust methods that included a combination of symptoms strongly associated with infection. Treatment Covid treatment for dogs is an effective method for preventing and treating rabies in dogs. It has several advantages over other vaccines and antibiotics for this illness. During the initial phase of the disease, the vaccine is safe for dogs and has a high sensitivity. Moreover, it effectively controls the disease once it has been established. However, this treatment should not be given to pets that are ill or that have been infected with other diseases. Therefore, you need to follow the guidelines to ensure your pet's safety. First, it is important to know the symptoms of COVID disease. Infected dogs can exhibit signs of the disease even without a diagnosis. You can contact your veterinarian immediately if you suspect your pet might have the disease. Remember to wear gloves when handling your pet. Also, it would help if you washed your hands thoroughly after touching your pet. Moreover, it would help if you also separated your pet from other animals and people. Also, ensure your dog uses its bathroom and litter box. Learn more at: [url="https://lovingdogsdaily.com/"]Lovingdogsdaily.com[/url]
|
While there is no universal cure for bunions, there are a number of options that can help you manage the symptoms and prevent future pain. These options include exercise, wearing shoes with a wide toe box, topical gels, and even surgery. If you're considering surgery for bunions, it's important to understand the benefits and risks of this procedure. Exercises to prevent bunions To prevent bunions, exercise the muscles and joints that support your foot and ankle. You can perform this with a variety of equipment, including lightweight exercise machines. For instance, you can train your grip strength with marbles, a small ball, or weak resistance bands. You can also use your body weight as resistance while standing and balancing on one leg. Exercises to prevent bunions also help improve posture and gait. One such exercise involves stretching the big toe muscles. A small exercise band can be wrapped around the outside edge of each big toe. While you stretch the band, keep the toes raised while flexing the foot in the air. Continue this exercise for three to five minutes. Wearing shoes with a wide toe box If you suffer from bunions, you can help alleviate the pain by choosing shoes with a wide toe box. They should also be made of stretchy materials and have a soft sole. They should also have a strap or laces that can be adjusted. Also, try to avoid wearing shoes with pointy toes or heels more than two inches. Wearing shoes with a wide toe area is one of the most important things you can do to prevent your bunions from getting worse. A wide toe box will give your toes more space to spread out and not get pinched. A shoe with a wide toe box also makes it easier to walk and stand comfortably. Shoes that are too tight in the toe box can even make your bunions worse. Using topical gels Topical gels and creams for bunions can be effective in alleviating the pain and inflammation in the short term. These remedies are available in drug stores and are relatively inexpensive. However, there are certain disadvantages associated with using these treatments. One of them is that they don't provide long-term relief. While bunion products can help reduce pain and slow down the progression of bunions, they cannot correct the problem without surgery. Therefore, you should consult a podiatrist for proper treatment. Bunions can be a cause of other problems, such as poor alignment of the foot or the wrong alignment of the toes. For example, women who have bunions often wear tight shoes that put a lot of pressure on the outside of the toe. Moreover, high heels increase the pressure on the front part of the foot. As such, bunions can be extremely painful and make it hard to wear shoes. If the condition is bad enough, it may even become impractical to wear shoes or walk. Surgery to treat bunions Surgery to treat bunions is an effective way to correct deformities and restore functionality to the toe. It can involve several procedures and often involves realigning the bones of the foot. Doctors may use screws or plates to fix the problem bone. They may also fuse the bones of the toe together for additional stability. Patients can return to normal activities soon after the surgery. However, surgery for bunions is not recommended for everyone. It takes time to heal and the bunion may recur. After surgery, patients must follow certain instructions to avoid recurrence. Taking a foot bath to relieve pain A foot bath can help relieve the pain and inflammation associated with bunions. Taking a warm foot bath is an effective treatment that helps relieve pressure on the big toe joint. Foot baths can also be used to relax the entire foot. When taking a foot bath, it is best to use warm water and use a soft towel to avoid direct contact with the skin. It is also a good idea to elevate the foot when soaking, especially if the big toe joint is sore or inflamed. When taking a foot bath to relieve pain when treating bunion, you should soak your foot for about 10-15 minutes. You can add Epsom salt to the water, which will soothe the pain and promote healing. However, the Epsom salts may be drying to the skin. Taking a foot bath after a long day of standing may be beneficial for those with a severe bunion. Learn more at: [url="https://buniondr.com/"]buniondr.com[/url]
|
If you're new to sewing, there are a few beginner-friendly sewing machine tips to get you started. These techniques include threading the machine correctly and choosing a model that fits your needs. These tips can make your sewing experience a lot less frustrating and more successful. Hopefully, you'll soon find yourself sewing like a pro. Properly threading a sewing machine Threading a sewing machine correctly is an important step in sewing. It is important not to overload the machine with thread or use the wrong thread for the project. This will result in poor results. Using thread guides is an excellent way to simplify threading a sewing machine. They will help you thread the machine properly and make sewing easier and more enjoyable. The process of threading a sewing machine is not difficult and should only take a few seconds. Just be sure to follow the instructions on the faceplate of the machine to avoid any mistakes. Most new sewing machines have a threading diagram printed directly on the machine, but if your machine is not new, you may want to consult the manufacturer's manual for instructions. Once you've read the manual, threading your machine is simple and easy. Just follow the steps in the proper order. Choosing a sewing machine When buying a sewing machine, there are many factors to consider. You will use the machine often, so you should invest in a durable model with a metal frame. You should also look for a machine that comes with a variety of attachments. These can range from basic features to hundreds of different options. Take the time to compare different machines and see which ones will work best for your needs. A sewing machine is an investment, and can cost anywhere from PS100 to thousands of pounds. Buying the right model is important to ensure that you'll enjoy it for a long time. Also, choose a model that will be easy to service and buy accessories for in case you ever need them. Choosing a model Before you begin shopping for a new sewing machine, you should clarify your requirements. Ensure that the model you choose will perform well and have the potential to grow with you. There may be certain nonnegotiable requirements, such as the size of the space needed for storage and accessibility features. As with any purchase, consider efficiency as you narrow down your choices. A sewing machine is an expensive investment, so choose wisely. It can cost as little as PS100 or as much as thousands of pounds. Before making the purchase, try the machine in a sewing store to get a feel for it. Take your time and carefully examine all of its parts, making sure there are no damages. Choosing a brand When choosing a sewing machine, the first thing you should think about is the number of stitches that the machine can do. This question may sound easy, but it can often be tricky to answer. The number of stitches isn't the only important factor - you should buy a machine that has the stitches that you use most. There are many different brands of sewing machines to choose from, including tried and true names as well as newer and more efficient machines. The newer machines are computerized and often perform multiple functions. There are also mechanical models that are built to last for decades. The country of manufacture is also a factor to consider when choosing a brand. Some companies produce their machines in multiple countries, which may affect their pricing. See Also: [url="https://thestylewrites.com/best-sewing-machine-under-200/"]Best Sewing Machine Under 200[/url]
|
The word "hobby" has an entirely new meaning in recent times. Over the last two decades, the nature of children's activities has drastically changed. The past was when children were captivated by crafts or going outside to play and enjoy nature. Today, they would rather play videos or play games. If you're looking for a creative activity for your children, sewing is an excellent option. The main thing to remember about making a sewing machine is that it demands lots of patience and perseverance. The child will be taught to remain calm when faced with difficult situations. This skill can be helpful in the future. The best sewing machine is an overwhelming task. Many options available in the market can easily be confusing for any parent. There are many things to be looking for when selecting the ideal machines for sewing for children. Most parents believe that it must appear attractive to ensure that the children enjoy playing with their new machine. In reality, a beautiful toy can be a great way to get children to play with it, but appearances are not as important when it is a machine. Many pretentious models are available on the market. However, they don't have much value. These models aren't built to make an item that will last for a long time. It produces chain stitches that could break or even split very quickly. The machine might look intriguing, but it's not worth the money. Kids will lose enthusiasm for sewing before they become enthralled with the machine. You May Also Like These: [url="https://thestylewrites.com/best-sewing-machine-for-advanced-sewers/"]Best Sewing Machine for Advanced Sewers[/url] When you're trying to pick the ideal machines for sewing your children, be sure to keep these tips in your mind: Budget First, you should remember that your sewing machine must be affordable. You may think your child will be a fan of sewing. However, the reality may be different. The budget also plays a crucial role in selecting the machine since it could impact the capabilities. The toy-like, cheap sewing machines can be had for free. The purchase of a low-cost sewing machine could ruin the passion for sewing your child may possess. Appearance There are a variety of sewing machines that are available on the market for children. Instead of buying cheap but attractive models, it is best to purchase the best model. Durable models may not be as attractive as toys and sewing machines. Some businesses offer entry-level sewing machines with various themes, like Hello Kitty for children. Durability The sewing machines that look like toys aren't long-lasting. They can break easily and don't have the best stitching patterns. If the toys your child uses aren't durable, they are likely to break. The toy for your child must be durable enough to withstand rough handling. Safety When you put an item in your children's hands with sharp pins, it is essential to be safe. The top sewing machines you can get for your children will have several safety features. * It should come with an auto-stop feature. Sometimes, a child's skin can be stuck in the machine. If it is equipped with an auto-stop feature, it will cut off the power on its own in case there is too much resistance. * If your child is in the process of developing skills, speed control is a must. It allows your child to work at various speeds while understanding patterns of stitching. * Finger guards are the most crucial component of safety measures for sewing machines. It protects your child's finger protected from sharp edges. If the model you're planning to purchase doesn't come with the finger guard, you could purchase it separately. Winding and loading Bobbins Choosing the ideal machine for sewing your children must be easy to operate. The most frustrating part for any child will be loading the bobbin. The machine you pick must have a simple operation. This will be ideal if you can find a machine with automated bobbin winding. With less expensive machines, the bobbin can jam. This can cause many frustrations for children, and they could lose attraction. Find online reviews of the product before purchasing it. Presser's feet Most of the items on the market can snap on presser feet. A few of them include zipper and buttonhole feet, too. These options are helpful when you want your child to explore the world in different dimensions and play in their imagination. Stitch patterns There are various options on the market, each with various stitches. Machines with a larger quantity of patterns usually attract parents. Unfortunately, these machines are extremely complicated for a child. The fact that you wish your child to have plenty of choices in stitch patterns doesn't necessarily mean the machine is complicated. There are a few machines that offer fewer stitches. Any machine with 10 and 25 stitch patterns could be considered an excellent entry-level machine. Conclusion Parents must let their children's imaginations develop. A hobby is helpful in this. Sewing is among the oldest and most fascinating kinds of hobbies. It does not just allow children to take an exciting route in life but helps them stay at peace and be patient in tough situations. When you're looking to buy the top sewing equipment for your child, There are many things you need to be aware of. Cost quality, durability, user-friendliness, and safety are crucial aspects to consider. In other words, it is impossible to go wrong using the sewing machine you buy for your child when the machine is of top quality. Don't buy a machine that is too complicated. Always encourage your children to explore different patterns. Have fun and discover the various techniques. Engaging children in these activities can positively impact their lives. They will realize how crucial it is to study and be able to enhance their creativity.
|
Ingredients for Chocolate Chip Cookies: 1 cup shortening (Crisco) 1 cup sugar ½ cup brown sugar ½ tsp. vanilla 2 eggs 1 tsp salt 1 tsp baking soda 1 package semi sweet chop chips (12 oz) 2 cups + 2 Tbl flour ½ cup chopped nuts (optional) Making Chocolate Chip Cookie Dough The first thing you need to do to start making chocolate chip cookies is preheat the oven to 375 degrees. This is so that when you finish making the cookie dough, you can immediately start baking. Chocolate Chip Cookie Dough Now use a large mixing bowl to combine all the wet ingredients – shortening, eggs, and vanilla. It’s best to use something like a spatula for this to help work the shortening. Once you have mixed these together well, blend in the white and brown sugar as well. In a different bowl, you’ll want to put in the rest of the dry ingredients – the salt, baking soda, and flour. Use a fork to make sure the dry ingredients are evenly distributed amongst each other. After that, put half of the dry ingredients into the wet bowl. Blend them in with your spatula until the mixture smooths out then add the other half of the dry ingredients and blend until smooth again. The reason you don’t want to dump the dry in all at once is because it can cause your chocolate chip cookies to become clumpy. Now that your dough is starting to take form, you can add in your chocolate chips as well as chopped nuts if you like them with chocolate like we do! Baking Chocolate Chip Cookies With the dough all made, it’s time to start making the cookies. First though, get a cookie sheet and rub it with a light coat of shortening using a paper towel. This will make sure your cookies don’t stick to the surface as they’re baking. Use a spoon to get about a tablespoon of cookie dough then roll the dough into a little ball with your hands or an ice cream scooper works good as well, but don’t get too much dough or your cookie will be huge! Place the cookie dough balls about 2-3” apart so that they have plenty of room to spread out while baking without running into each other. Once your cookie sheet is full of dough balls, put it in the preheated oven and bake them for 8 – 10 minutes. It won’t take long once you put the sheet in for that unforgettable aroma of warm baking cookies to fill your entire home! Time for Chocolate Chip Cookies After the cookies are done baking in the oven, pull them out and let them cool on the sheet for about 2-3 minutes. When they’re done cooling, use a spatula to put them on a plate or preferably a cooling rack. Allow them to cool another 5 minutes or so before eating, or they might burn mouths. Chocolate chip cookies are perfect by themselves with a tall glass of milk or break them apart and put them in vanilla ice cream for easy chocolate chip cookie ice cream! Store the cookies you don’t eat right away in an airtight container, so that they won’t become stale over time. Be sure to let us know if you liked our chocolate chip cookie recipe or if you want to share your own recipe! You may also like: [url="https://throwingwaffles.com/best-waffle-makers/"]Best Waffle Makers[/url]
|
A key part of sustainable strawberry gardening is the ability to transplant strawberries and create multiple generations of strawberry starts. It doesn’t make any sense to buy seeds every year and start from scratch, especially when the best strawberry yields are on the 2nd and 3rd years of growth. The optimal way to keep your strawberry garden expanding year after year is by transplanting starts from old to new beds where they can grow more freely and create their own patch of new plants. Digging Up The Starts The main thing to remember here is to steer clear of the roots with whatever digging tool you are using. It seems pretty common sense, but we have seen some strange gardening practices, so it is best to mention it. You don’t have to be too careful when you are pulling them up, but it will still require firm pressure. If you look at the video we made, you will see we aren’t treating them with any sort of special care. Once you pull up your starts, brush aside any excess material to prepare them for replanting. Setting up the Strawberry Bed Strawberries thrive in raised beds of dirt. Strawberry plants and fruit rest on the ground naturally. This allows moisture to collect around and under the plant which increases the chance of molds ruining your juicy berries. Raising the bed gives a way for excess moisture to run off and away from your plants. At our community garden, we have created raised beds that are 24” across. Having such a wide hill allows us to stagger where we plant our young strawberry plants in a triangle formation and create an optimal area for them to expand and multiply themselves. Our strawberry transplanting video shows this process more clearly. Replanting the Strawberries It is important that strawberry starts get the appropriate amount of space between them. The runners will stretch out in every direction and root themselves in new areas to begin the cycle of strawberry life once again. Planting starts too close together will hinder this replication process and also have a negative effect on overall yield. We suggest 10-12” of space between each plant. At these distances apart, we have found that a strawberry plant will yield approximately 1 quart the first year, 1.5 quarts the 2nd year, and 2 quarts the 3rd year. Bringing in the Next Generation With these 3 simple steps, you will be well on your way to creating your own strawberry field at absolutely no cost for new plants. It only took us 4 years to increase our strawberry output by over 500%. The people from our garden are literally taking home gallons of strawberries. We got 40 gallons just for ourselves that we used to make jams and shared with family. Tickled our tongues for months! You can do just the same with a plan of action and the right knowledge. Want to know more before getting started? Then check out our website [url="https://elliotthomestead.com/"]elliotthomestead.com[/url] which show how to grow strawberries more effectively. Once you are ready, start getting dirty and start gardening!
|
Home-cooked fries, rustic baked and mashed potatoes, hearty stews. Potatoes are well-known for their versatility in the kitchen. Add onto that their reliability as a food crop, and it’s no wonder people have been growing potatoes as a primary food source for close to 10,000 years! It’s for these reasons that growing potatoes in your home or community garden is a perfect way to build a robust foundation of flavors you and your loved ones are sure to indulge in. Potatoes 101 – Before You Plant Potato starts come in the form of a root or tuber. They will be small and look very much like a mini version of a potato. From these singular roots, a complex passageway of roots will unwind and return you many more potatoes than you began with. To do this, you will need to give your potatoes the proper space and environment they need to thrive and become high yielding plants. Potatoes need the proper area to be successful and that means spacious. Each potato will need to be 6-8” deep and at least 18” from any other plants to ensure they have enough room to stretch out. Make sure you have plenty of space and feel free to use our recommendations as a guide when planning your potato patch. It’s also important to know that potatoes grow well in more acidic environments. The pH of your soil should be between 5 and 6, so your potatoes have access to the nutrients they need. Test your soil prior to planting your potatoes because it is much easier to balance your soil before you start growing rather than after! Planting Potatoes and Growth Once the soil bed is prepared, you can start settling in your new arrivals. As mentioned before, you should dig holes that are at least 6” deep and 18” apart. When the holes are dug, place a single potato start down inside and cover it as loosely as possible. Potatoes grow best in soil that is loosely packed, so always try your best to keep the soil light and fluffy. Another way to help the potato grow properly is by covering it in phases. When burying it in at the start, cover it only with 1-2 inches of dirt. Wait until the eyes begin to make their way through that layer before adding another. Repeat this process until your hole becomes level with the surface again. Relax and Enjoy the Show After this, it’s just a matter of taking care of them and admiring your gifts from nature. Watching your potatoes grow and flower during spring is definitely an exciting time, which is why we will be sharing videos showing how our potatoes progress throughout the weeks. We hope you’ll join us and share your own tips and tricks or ask us any questions you have by commenting below or on any of our website: [url="https://elliotthomestead.com/"]elliotthomestead.com[/url]. We love interacting with other fellow gardeners because we have learned one simple truth. We all get better results when we learn to grow together.
|
Growing Strawberries Growing strawberry plants that have all the room in the world to stretch out unhindered will no doubt become prides and joy of your harvest. A major threat to this optimum environment is other aggressive plant life. A farmer wouldn’t leave his chickens in the open if he knew wolves surrounded it. He would take the proper precautions to make sure they are well protected from any potential dangers. Weeding is protecting your succulent fruits from the wolves of the soil. We know weeding isn’t the most exciting part of gardening, but there is no question that weeding is a necessity that makes a little work go a long way towards positive results. Know What You’re Fighting First of all, you should identify the types of weeds you have to remove. Find a book or look on-line at weeds that are native to your area. There are two different kinds of weeds, annual and perennial. Annual weeds spread by seed, such as dandelions, and perennial weeds spread by roots. Knowing this will help you better devise a plan to get eliminate your nuisances. Weeding Strawberries Removing the Invaders After you know what you’re up against, you can start taking some action. To begin, you need to remove any flowers from the annual weeds to keep them from spreading their seed when being pulled out. After this, use your small shovel to dig below the root and pulling toward you, remove the entire plant. Perennial plants have longer roots than annual plants. Use the shovel to dig below the root of the weed. Pull the weed toward you. If it does not come out easily, you need to dig deeper to try and remove the whole weed. A lot of this process can be made easier with gardening gloves, shears, and a small-handled shovel. Another option for discouraging weed growth is placing plastic garden cover over the row and making slices where the plants are coming through at. This makes it much more difficult for any potential threats to interfere with your plants. Flowering Strawberries Keep Your Berries Safe with a Watchful Eye Staying on top of the weeding and removing them every couple of weeks is not only going to keep your strawberries happy, but it will make the job of keeping the weeds under control much easier. By not having to compete for territory with weed, your growing strawberries will have a monopoly on all the resources it needs to repay you in volume and flavor. If you have any questions, comments, or suggestions about our page, please feel free to comment below. We love talking to other fellow gardeners! Learn more: [url="https://elliotthomestead.com/"]elliott homestead[/url]
|
Japanese girls heaven In Tokyo ,Shin Okubo hidden spots https://www.youtube.com/watch?v=tnqtIzjH2cQ You can see more here: [url="https://thestylewrites.com/beautiful-japanese-girls/"]japanese girls[/url]
|
Pac-Man's 30th Anniversary Google Doodle 30,000+ Point Game (550th Upload) https://www.youtube.com/watch?v=cPrrG7xk19w Read More: [url="https://thestylewrites.com/pac-man-30th-anniversary/"]pacman 30th anniversary[/url]
|
10 TIPS FOR NEW DRONE PILOTS + GIVEAWAY https://www.youtube.com/watch?v=z885RDQ7Hi8 You can also learn from [url="https://civicdronecentre.org/"]civicdronecentre.org[/url]
|
The Skeletal System https://www.youtube.com/watch?v=12C3LbB7hr8 More at: [url="https://thestylewrites.com/skeleton-names/"]skeleton names[/url].
|
Sure, canning is fun and all, but sometimes it can be a little time consuming. Try freezing instead. We talked to Robin Seitz, the nutrition specialist and Extension Agent at the Onslow County (NC) Cooperative Extension about the best way to freeze tomatoes (We’re experiencing a slight bumper crop this year of Roma tomatoes, so we’ve got a lot to put up right now. Find out more about Roma tomatoes from NE Seed here.) The method is easy and quick and is a great way to put up tomatoes for soups, stews and sauces. Here are the step by step instructions: 1. Core the tomatoes Start by removing the stem scar of the tomatoes and the core. You can use a paring knife or a fancy corer made for tomatoes (and strawberries) like this one. You’re essentially trying to get that hunk of tough flesh out of the tomato so you won’t have to deal with it later. 2. Skin the tomatoes Get a pot of water boiling good and hot and dunk your cored tomatoes in. The skins will split, allowing you to pull them off with ease. Be careful, the tomatoes will be hot when you pull them out. It only take a moment or two to work. 3. Bag the tomatoes Take the skinned, cored tomatoes and put them in freezer bags or any container with a lid. Robin suggests using containers (like this). The containers are reusable (which saves landfill space) and help prevent crushing the tomatoes. After bagging them up, put them in the freezer and let it do its job. You’ll have perfect tomatoes for sauces, soups and stews, Robin said, all year long. As an added bonus, that little bit of cooking to strip the skins makes lycopene available. Lycopene is an antioxidant with proven health effects and is the pigment that gives tomatoes their lovely red color. You can buy lycopene supplements like this one, but we think it’s better you get as much nutrition as you can from whole, natural foods. For smaller tomatoes (roma, cherry, plum, etc.) you can just put them on a shallow baking pan and flash freeze them. If you have smaller type tomatoes, then you won’t have to take the step of cooking them to skin them. You will have to remove the skins later, Robin said, which could be tougher because of the freezing process, but it shouldn’t be a problem. Enjoy! See Also: Water Bath Canners
|
Learn How to Use a Grill – 6 Steps to Becoming a Grill Master  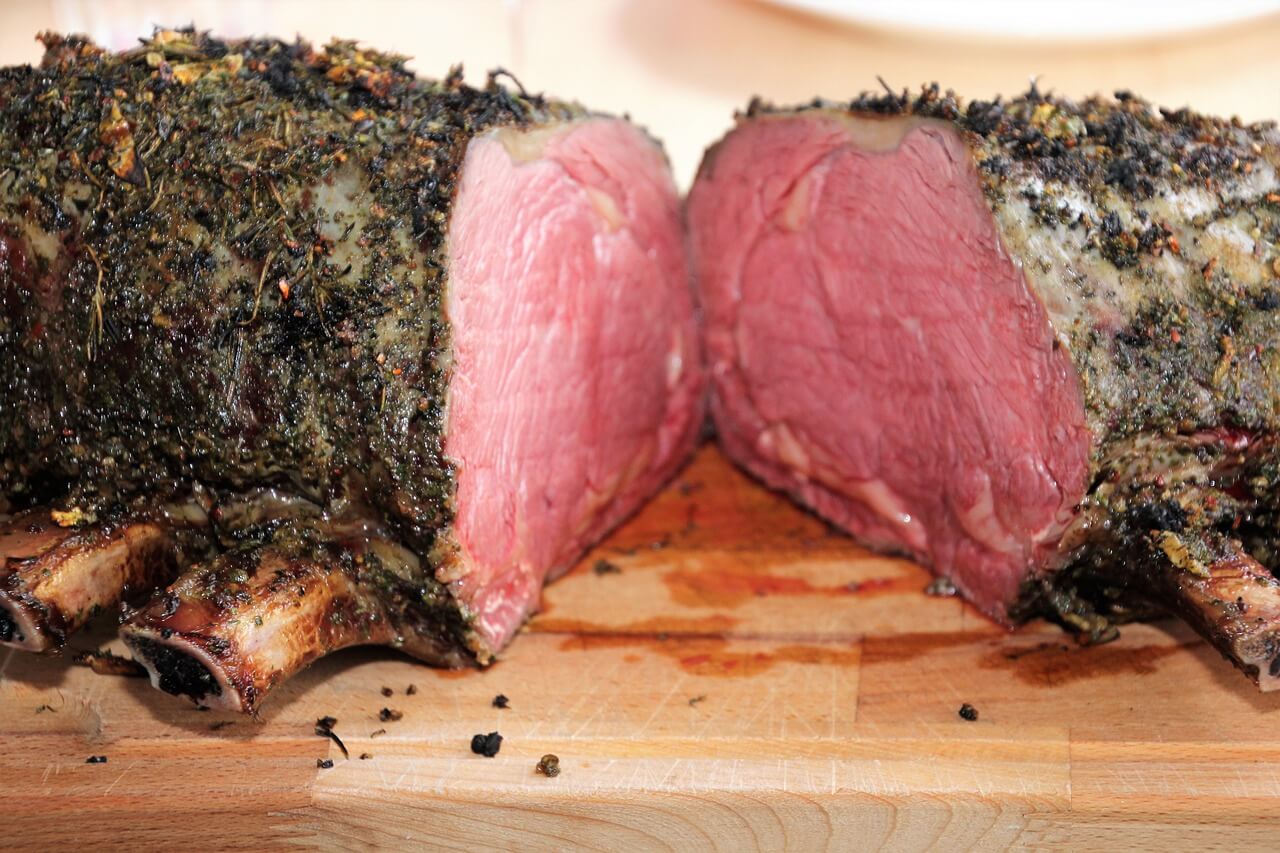 It is too hot to cook inside. So, pack up the food and move it outdoors! Our grill of choice is charcoal with a chimney starter. We do not like our BBQ to taste like lighter fluid, so we don’t use it (who knows what’s in that stuff). When I first got a grill – I felt like I was in over my head. But I was determined to learn how to use the grill without any help, so I could become a backyard chef. After hours of researching and trial and error – I have a system set up and I thought I would share it with you. Here is my method: 1. Make sure the grill grates are clean and the old ash is dumped. 2. Load charcoal into the chimney on top of the grill, add newspaper and light. When you start seeing flames at the top, pour the coals over the bottom of your grill and wait until they turn an ashy gray. 3. Once the coals are a gray color, arrange them equally on the bottom of the grill base. Tip: leave an area of the grill with no coals – this really helps when you have a flare up (flare ups happen when the juices from your meat hit the fire) No matter how tempting it is – DON’T use water to tame flare ups – it will cause ash to get all over you food – DON’T ask me how I know this. 4. Put some oil on those grates to keep your food from sticking. I wad up some paper towels, dip them in olive oil and use a pair of tongs to grease the grates. 5. Learn how to control the temp. This takes some getting used to… But once you get the hang of it – it isn’t that bad. There are vents and dampers on the top and bottom of the grill. The wider you open the vents – the more oxygen – the HOTTER the grill gets. To lower the temperature cut off some of the oxygen flow by closing the vents – just don’t close them all the way or your fire will go out. Which is no fun – because you will have start all over… 6. Now you are ready to cook! Grilling the Food: Now that you are cooking with fire here are a couple of tips for cooking straight from the garden! It just so happens that our garden is not far from our grill. So a lot of times we will just pick the vegetables, wash them off, cut them up and put them right on the grill. Our favorite vegetables to Grill:[ Cabbage Asparagus Corn Eggplant Mushrooms Peppers Onions Squash Grilling Vegetables is pretty easy. All I do is cut the vegetables up (always make sure to cut them large enough so they don’t fall through the grates – don’t ask me how I know this). Make a marinade of olive oil, balsamic vinegar, salt and pepper. Coat the vegetables with the marinade and lay the vegetables directly on the grill (medium heat). Depending on the vegetables – grill time is 10-15 minutes. Just grill until the vegetables reach your desired tenderness. How to Grill Chicken: Grilling chicken on a charcoal grill can be tricky. If you don’t do it right – it will be bone dry. Following these tips will help you grill chicken you are proud of serving! 1. Tenderize the chicken. Go to town on the chicken with a meat tenderizer tool. 2. Marinate the chicken. This is my favorite marinade. 1/2 cup balsamic vinegar 1/4 cup olive oil 1/2 teaspoon garlic powder 1/4 teaspoon black pepper Marinate the chicken for a couple of hours before grilling. Place the boneless chicken breasts on the hottest part of the grill. Let grill for 3 minutes. Rotate chicken 45 degrees and place back on the grill. Cook for 4 minutes. Use tongs to flip the chicken breast. Grill for 2 more minutes. Rotate 45 degrees and place back on the grill. Cook for additional 2-4 minutes. Use meat thermometer to make sure meat is 165 degrees in center. Let meat rest for 7-10 minutes before serving. See Also: internal temp for smoking brisket |
It’s time to plant potatoes! If you’ve never done it before, here’s a step by step guide to planting your own potatoes. And trust me, when you harvest them, they’ll be even better than store bought potatoes. Step 1: Buy seed potatoes Purchase seed potatoes from a good company or even your local feed & seed store. Don’t use sprouted potatoes purchased from the store. Seed potatoes are certified to be free of blight. Once potato blight gets in the soil, you won’t get it out. The potatoes purchased from the store can grow potatoes, but they could carry blight, thereby infecting your soil, ruining any future potato crops. So spend a little scratch and get the certified potatoes, it’s worth it. Step 2: Cut your seed potatoes up To maximize your crop, you’ll want to cut your seed potatoes up. Cut each potato so that you’re left with chunks that are about 1.5 ounces with one or two eyes per piece. If your potato is about the size of a golf ball, you don’t have to cut it. After the potatoes are cut into pieces, put your pieces, cut side up, and let them dry out for one or two days, until the cut side is dry and leathery. Step 3: Plant your potatoes After they’re dry, dig a trench about 4 inches deep. Place the cut potatoes 8-12 inches apart, cut side down with the eyes facing up. You’ll see sprouts in two to four weeks, depending on soil temperature (potatoes like soil temps at least at 40 degrees F). Step 4: Hill your potatoes When the plants are six to eight inches tall, use a garden rake to pull soil around the plants along the row, essentially burying about 80 percent of the plant. Repeat the process in about two or three weeks. Step 5: Trim the seed pods Your potato plants will flower and eventually produce tiny little fruit at the top. These contain the actual potato seeds. You can save them if you want, but it’s a lot easier to save seed potatoes from your final harvest. If you don’t want to save the seeds, then cut those off. It’ll direct more energy into those delicious tubers. Step 6: Harvest your potatoes Potatoes take anywhere from 16-20 weeks to grow, depending on variety. Once the plants start dying, the potatoes are ready to harvest. Use a garden fork to dig the potatoes out of the ground. Start about a foot away from the plant and pry the root mass out of the ground. Dry the potatoes out of the sun for a couple of days before storing in a cool, dark place. Enjoy! Learn More At: The Elliott Homestead
|
Chances are if you are involved in the modern homesteading world, you have heard the term “permaculture” floating around. Chances are if you’ve heard that word, you’ve heard of “hugelkultur” as well. Besides being a ridiculously funny word to try to pronounce, the term hugelkultur holds world-changing importance to modern gardeners. So, what’s so darn great about it then? I think it comes down to one thing: water. With a hugelkultur bed, you can eliminate the need for any irrigation or watering system. Boom. Yeah, I said it. Sounds pretty crazy right? But it’s completely true. Well, after the first year, but still! Give them hugels some credit! So I guess I should probably tell you what the heck it actually is, eh? Prepare yourself. It’s really realllly complex. Psyche! It is literally just buried wood in soil. That’s all it is! So, not only can you save tons and tons of water by setting up one of these hugelkultur beds, but you get to use up any old rotted wood you have lying around, even unwanted twigs and branches. Before we get into the details on how to build one of these bad boys, I want to give you a little background on hugelkultur. It’s a German word. It’s been practiced in Eastern European cultures for hundreds of years and it’s been recently further developed by permaculture gurus, Sepp Holzer and Paul Wheaton. There. When I said little, I meant it. Now, onto the fun stuff. First, I want to explain how it actually works. It’s pretty cool. Basically the hugelkultur beds mimic the natural decaying cycle of the forest floor. As the wood decomposes underneath the soil, its porosity increases so it becomes almost like a sponge. So, it soaks tons of water up, and then slowly releases it back to the plants in the hugel bed over time. Also, because the wood shrinks when it decays, it frees up little air pouches in the soil which enables a little self-tilling situation! How neat? During the first year or two you will definitely need to water it a bit, but after that it should be completely independent of water. Oh! Another nifty benefit — because everything will be doing it’s little composting business in the first few years — you will probably get a longer growing season because the soil will be warmed up. In general, the rotted wood will make for a raised garden bed that is incredibly rich with organic material and huge amounts of nutrients. Speaking of nutrients, let’s talk wood. Paul Wheaton makes a really good point in his article, “Hugelkultur: the ultimate raised garden bed”. Wood is high on the ol’ carbon scale. Meaning it will want lots of nitrogen to do it’s composting business. This could take away from the plants you have in the bed. However, if the wood is already well-rotted, it shouldn’t be a problem. So yes, you can definitely use fresh wood you just chopped, even if it isn’t rotted, but it could take away from your plants for a while. While we are on the topic of wood, it’s pretty important to choose the right type. For example, Black Locust takes ages and ages to rot, so it wouldn’t be the best choice. Also black walnut and cherry can be quite toxic so it’s best to avoid those as well. Good options are alders, apple, cottonwood, poplar, willow, and birch! Finally, how do we build one? The cool thing is, a large part of the design and size is entirely up to you. Some people build them on top of sod. Some people dig up a few feet of soil and build them in that. Some build them really tall. Some people build them shorter. Tomato. Tomahhto. I’d say most people that I’ve seen build them around 3-4 feet tall and about 3-4 feet wide. Length varies tremendously. However, Paul advocates in his article that the taller the better. He says it holds moisture much longer that way, and you don’t have to bend over to plant or harvest. Bonus! He recommends building it 7 feet tall because it will shrink about a foot. So, first things first. Lay down the wood. Big logs. Small logs. Twigs. Branches. All of it. If you want, you can add soil in between the layers of wood, it will probably make it much more sturdy that way. Water each layer. After layering the wood, add the soil on top! Voila, you have a garden! Finally, it is best to let the hugelkultur bed settle in for a few months before planting. After those few months, plant and mulch your bed! There can be a lot of variation with these and still, they will be successful. When it comes down to it, yes, they are much more work to set up than just your regular square flat garden bed. But the amount of work it eliminates over the years 1000% makes up for it. Not only for yourself, but for the entire world. Think of how much water we could save if each of us traded our water-hogging flat beds for one of these. Think of how much time and energy we could save with no tilling, and no back-breaking planting and harvesting! Oh did I mention less water makes all of your food taste way better? There really are just no reasons not to jump on the hugelkultur train so get to building one (or 5) right now so you can plant in the spring! More at: https://elliotthomestead.com |
If you haven’t already, now’s the time to get your garden beds all tucked in for winter. Here’s our methods for winterizing your garden bed. If you follow these tips, your beds will be all ready for planting at the beginning of the spring and hopefully weed free. Clean it up If you’re like us, it’s easy for weeds to overtake a bed at the end of Summer/beginning of Fall. After your harvest comes in, you might be tempted to get a little lazy. If so, now’s the time to get out there and clean that thing out. Removing weeds now will be a little easier, since cold weather in the northwestern hemisphere has killed a lot of them off. So get out there and clean those things out while they’re dormant. It’ll be a lot easier doing it now than in the Spring, when all those things come back to life and start taking over. See Also: How To Kill Your Grass? Kill Unwanted Grass In Your Yard Aerate your bed Depending on who you ask, tilling may be the worst thing you can do to your soil, but adding a little air to the beds will be a big help. Not only will it loosen the soil, making it easier to plant in the spring, but it’ll help give oxygen and space to earthworms and those microbial little beasties that help with overall soil health. If you don’t want to till the soil, you can use a broadfork. Test the soil If you test your soil, you’ll have a heads up on what your garden beds need in order to flourish next season. A soil testing kit can be gotten from your local cooperative extension office (find it here). While you’re at it, you can test for nematodes and other pathogens in the soil. This will inform your fertilizer process and/or cover crop strategies (mustard is known to fight nematode populations). Mulch it Now you have your soil test in hand, it’s time to mulch your bed. A good mulching strategy does wonders for a garden bed. In addition to keeping weeds down, mulch can provide much needed nutrition to your soil. Use your soil test to determine what you need. There’s a lot of different types of mulch: Cover crops, wheat grass, pine straw, wood chips, bark, even plastic if you’re so inclined. If your soil test indicates you need nitrogen, cover the bed with a combination of composted animal manure and woodchips. While the bed lies dormant in the winter, the mulch will keep that nitrogen in place for your plants to use. Even if your bed is in perfect health, nutrition wise, you may want to consider a cover crop of rye grass, which naturally prevents other weeds from growing in the bed. If you decide to go with plastic, be aware, the material has been shown to retard beneficial microbial and fungal growth in the soil. Learn More From The Elliott Homestead
|
| It’s cold weather time, and that means a lot of chicken keepers are worried about keeping their birds from freezing on their roosts. During this time of year, there’s always a few fires in chicken coops where well-meaning owners put space heaters or heat lamps to keep their animals toasty. But, it doesn’t take a fire marshall to explain the issues with putting heating elements in a small space made of dry wood, lined with straw and filled with flapping, unpredictable animals. There’s not a lot of officials safety information regarding chicken coops, but these common sense tips, along with barn fire safety tips from the USDA will go along way toward keeping your lovelies safe this winter. No smoking in or around the coop Sure it’s a no brainer, but it still needs to be said. If you’re smoking around a coop, an errant spark or hot ash can send all that dried straw and feathers up in a flash. An ember can smolder for hours too, so even if you’re careful and check around the coop often, that ember may sit for hours unnoticed, only to flare up in the middle of the night. Inspect your electrical systems often Lights and extension cords in a coop can lead to frayed wires and electrical sparks inside a coop, especiallay considering all the rough edges. Sparks lead to fires. So make sure any electrical wiring or outlets in and around your coop are well insulated and secure. A quick visual inspection can save a lot of time and heartache down the road. Secure your heat sources If you just have to use a heater in your coop — we suggest you don’t, see alternative heating methods below — then make sure it’s secure. Bolt it in place and make sure your animals can’t get to it. It’s a good idea to have a designated area for any heat source fenced off to keep your birds from flinging straw or wood shavings on the heating elements. Alternative methods for keeping your birds warm Perhaps the easiest way to prevent fires is to avoid electricity all together. No electric heat, no electric lights means no source of electrical sparks. But you may be worried that your feather babies won’t be able to survive a cold winter’s night. But, chances are, your chickens will do better in the cold that you think. Most breeds can survive temps down to 0 degrees Farenheit (-17C). But, there are some parts of the world that get even colder. How do you minimize electric heat in those situations? Insulation Insulating your chicken coop when you build it is a great idea. Even after it’s done, however, you can still use foam panels, reflective foil barriers and straw or wood shavings on the floor. This lets the heat the birds produce via body heat stay inside the coop. Just make sure you don’t give up ventilation for insulation. It may seem like sealing a coop up is a good idea, but even in the winter, your birds need fresh air more than ever. Deep litter heating You can also use the deep litter method for heating a coop. The idea is simple: Put straw or wood chips down as normal, but instead of cleaning it out when it gets soiled, add more clean straw or wood chips over the top. This material composts in the floor of the coop and the heat produced during the composting process helps keeps the birds warm. Fair warning: When the Spring comes, you’re going to have a bad time cleaning that mess out. Compost heating You can also use compost piles to heat chicken coops. This method is almost identical to using the deep litter method, but it involves using a mobile coop placed over a compost pile to produce heat. This method has something over the deep litter method, since there’s no cleaning at the end. But, if you don’t have a mobile coop then this one is going to be hard to pull off. Build a solar collector A solar collector can be built cheaply and easily. Essentially, it uses the sun to heat air in a glass encased chute that rises into the coop. Coupled with good insulation and maybe a thermal mass (see below) that warm air will be enough to keep your birds from turning into chickensicles. Check out this link to find out more about solar collectors and heaters. Check solar powered heat lamp for chickens Thermal mass A thermal mass is a material used in construction to absorb heat during the day and radiate it at night. Usually made of brick, concrete or rock, these A thermal mass can be built into your chicken coop during construction, but if not, then there are other options. You can spray paint milk jugs black and fill them with water and put them in windows (or in front of your solar collector). At night they’ll radiate the stored heat into the coop, just like any thermal mass would. If your coop is small enough, this is an easy way to keep the temperature of your coop just high enough to prevent frostbite. If you just take a little time, you’ll be able to baby your birds through the winter without incident. And there’s a bonus. Warm birds eat less. So if you do any one of these tricks, you’ll wind up with a cheaper feed bill at the end of the season.
|
 March 19 is National Poultry Day. It’s a day set aside to honor the myriad of poultry that we benefit from: Chickens, ducks, turkeys, quail, peafowl, pheasant — even pigeons! In honor of this great day, we give you a breakdown on how to raise chickens, the gateway drug of homesteading. Check it out and leave us your tips on raising fowl in the comments below! Raising chickens is fun and easy, but not for the faint of heart. Before starting out, you must know chickens prime egg laying years are in the first three of adulthood. So, if you want to raise them for eggs, then you’ll need to be aware that chickens live for 8-10 year — sometimes longer — so you’ll get diminishing returns as time goes by. Many chicken keepers deal with this by eating their birds. Others, like ourselves, grow a bit to attached to the animals, and keep them around for as long as possible. The choice is yours, but be aware, raising chickens can get expensive. First: Buy your chicks Find a reputable hatchery, or a local chicken keeper whom you trust, and buy chicks from them. While you can buy adult, laying hens, I find it better to raise the birds from just a day or two old. It’s more expensive to feed them for the first bit, but you’ll get to know the birds better. If you buy your chicks from a hatchery, pay the extra cash to get them sexed. You don’t want to raise too many roosters, as they get aggressive with the hens when there are too many roosters to compete with. A rooster isn’t required to produce eggs. If you get your chicks locally, take the time to visit the farm where they’re hatched. Look around. Make sure the place is clean and organized. Make sure the adult birds are healthy. Look for bright-eyed, curious animals that are calm and active. If the birds are listless, or stressed, it could be indicative of health problems that you don’t want to deal with. Second: Brood your chicks For the first weeks of life, chicks will need to live in a brooder. You can purchase one (like these here) or you can build your own. Either way, make sure the birds stay warm. The chicks aren’t big enough to generate enough body heat to keep themselves warm. The brooder ensures they have enough heat and light to grow up big and strong. Make sure the brooder stays clean. Young chickens are voracious eaters and they’ll make huge messes in the bottom of their brooder. Make sure you clean it regularly (for us, once a day was just enough). You May Also Like: Chicken Coop Heater Third: Feed your chicks At the early stages of life, chicks need to be fed starter feed, for at least 8 weeks. After the eight week mark, switch them over to grower feed until they turn about 20 weeks old. Then finally, layer feed. You can buy all of these things at your local feed store or, if you’d prefer non-GMO feed (we do!) then you can buy it all here. Most chicken starter is medicated to prevent coccidiosis — a parasite that can kill young chickens. However, many chicken keepers prefer to avoid medicated feed, as it can increase the parasite’s resistance to drugs over time. And if you’re going for organic certification, you’ll may have to use non-medicated feed. If you do decide to go with all natural feed, which is what we use, then you’ll have to do a little more research. Add diatomaceous earth to your feed and organic apple cider vinegar to the chick’s water. It’ll boost their immune systems, fight the parasites and the DE will help kill the parasites. Make sure they have plenty of clean, fresh water available at all times. Check this Grandpa Chicken Feeder Fourth/Third: Get your chicken coop ready Chicken coop designs are as varied as people. Everyone has their own way of doing it. Basically, you’ll need a place for your chickens to sleep, stay out of the wind, rain and cold. If you want to build your own, here’s some designs on Pinterest. If not, you can buy one here. Make sure your coop is big enough for the number of chicks you have. A good rule of thumb is you’ll need 2 square feet for each bird. Bigger is mostly better, as long as your coop is warm and dry. If you chickens aren’t free range, then you’ll need a run — basically a place for the darlings to run around, socialize and get some exercise. Make sure the run is open to the air, covered to prevent predation from hawks, has shade and grit. Grit is a product that allows birds to digest food. It also supplements their diet with calcium. You can buy it at feed stores, or online here. Again, make sure your chickens have free access to water and food. It’ll keep them happier. Happy chickens produce more eggs. Fifth?: Enjoy your chickens While you can get tons of eggs from your chickens (average laying rate is two eggs for every three chickens daily), you’ll also get tons of joy from the little darlings. You’ll have to feed and water your chickens every day, but after the novelty wears off, it’s easy to forget to take a little time to just sit and watch them. So whenever you have a free minute, I advise you to go and grab a bucket or foldable chair and just sit and watch your birds. They’re surprising complex animals with a sophisticated social structure (the proverbial pecking order). Bring some treats! Enjoy. Tips: Make a fodder system: A fodder system, either purchased or made, can provide supplementary nutrition for your birds. And it gives you a chance to know everything about what your chickens eat. Insulate your coop: If you build your coop, insulate it. The extra effort and expense will keep your birds more comfortable. Comfortable chickens are happy chickens. Happy chickens make more eggs. Close your flock: Once you get the number of chickens you’re comfortable with, don’t get any more! This is called “closing your flock.” By not introducing new birds into your flock, you prevent disease and infection from coming into your coop. New birds can bring parasites and disease into your flock. If you just have to buy new birds, make sure you quarantine them for at least a few weeks before introducing them into your flock. It goes a long way into keeping your birds healthy. 1 Like |
Are you looking for the best "Never Have I Ever" questions to help your group get better? This classic slumber party question is excellent for any Zoom or real-life game. We've already done all the hard work and created the fun, juicy questions, so you have to play. If you're new to playing, this is how to play "Never Have I Ever." Each player raises their hands, ten fingers visible. Then you'll go through the list. Each time a player completes an item, they have to put their finger down. The player with the most fingers wins. Let's get to the questions! Best Questions: never have i ever questions 1. I have never tried skinny dipping. 2. Never have I been on a blind date. 3. Never have I ever spied on an ex via social media. 4. Never was I ever hungover. 5. Never has ice cream ever been something I have eaten. 6. Never have I been in commando. 7. Never have I ever shaved the top of my head. 8. Never have I ever kissed my best friends. 9. Never have I ghosted anyone. 10. I have never done anything in front of a significant other. 11. Never received a speeding ticket. 12. Never had a tattoo done on me. 13. Never have I ever used the shower. 14. Never have I ever peed into a pool. 15. Never have I ever slid in someone's DMs. 16. Never broken a bone. 17. Never have I ever eaten and been spit on. 18. Never had I ever had a crush upon a sibling of a friend. 19. Never used a fake ID. 20. I have never had a crush upon a teacher. 21. Never been to a bachelorette or bachelor party. 22. Never was I in love. 24. Never have I been in a fight. 25. Never has my family ever heated up during a game night. 28. Never met a celebrity. 30. Never played spin the bottle. 34 I have never tried whipped cream straight from the can. 36 I have never kissed an ex-friend. 40. I have never auditioned for reality TV shows. 42 I have never smoked a cigarette. 45 Never have I ever done a lap dance. 48. Never have I ever sang karaoke. 50 I have never stayed overnight in a hospital. 52 Never have I ever stayed up late. 53 Never have I ever cheated during a test. 54. Never have I used a dating app. 55 Never been on a cruise. 56 I have never lost a bet. 57. Never have I ever kissed more people in 24 hours. 58. Never been in a car crash. 59. Never rode a bike. 60 Never have I ever cheated with anyone. 61 Never was I ever cheated on. 62. Never have I ever pretend to be sick in order to get out school. 63. Never have I ever beat a videogame. 66. Never had I ever had a negative balance in my bank account. 67. Never played strip poker. 68. Never been arrested. 69. Never been expelled. 70 I have never stolen anything. 71. Never have I spoken to my family about my sex life. 72. Mexico has never been a place I've ever visited. 73. Never had I ever tried caviar. 74. Never have I used another person's toothbrush. 75. Never have I had a hickey. 76. I have never used another person's Netflix password. 77. Never have I fallen asleep in class. 78. I have never been fired. 79. As a child, I have never been to the principal's desk.
|
Let's face the facts: The group chat is where the best things happen. This is where you make plans, debate what to send your crush, analyze Cole Sprouse's hair on Riverdale last night and then ask your friends which selfie they should post. There may be more than one group chat. You might have different squads, and each squad has their group chat. You might have one with your soccer team to vent about the morning's training and ensure that someone brings snacks on the bus. Or maybe you started one with your classmates to help organize your group project. Even if your siblings are your best friends, you might have one with them. You can mix up chats with roommates, your classmates, siblings, and your best friends. Apps make it easy to distinguish each member with unique group chat names. It's part of the fun of starting new chats with a group name. More Funny Names At: https://thestylewrites.com/funny-group-chat-names/ These are some of the most popular group chat names. Friends Group Chat Names The Meme Team Best Fries Forever The Friendship Ship The Chamber of Secrets F stands for Friends who Do Stuff Together The Real Housewives of ______ Taylor Swift's Squad Sisterhood of the Traveling Pants The Pretty Committee 7 Rings MerMAID To Be Friends for Ever The Schuyler Sisters All Single Ladies All things sugary, spice, and all things nice The Heathers The Three Musketeers The Core Four Quad Squad Fab Five The Avengers Power Rangers The River Vixens XOXO Gossip Girl The Southside Serpents LGBT-Cuties Birds of a Feather Peas in a Pod Girl Gang Girls, gals, and nonbinary pals Besties for the Resties Name a More Iconic Duo (or Trio) The Coven The Spice Girls Charlie's Angels The Backstreet Boys The Circle The Donut Call List Group Chat Names Dumbledore's Army The Nerd Herd Fantastic Four Pi: The Life of Pi We Who Shall not Be Named This group is A+ The Collective 39 Clues We get degrees Will Food Trade as for Trading It smells like team spirit. Future Presidents Secret Society Master Minds Grammar Enthusiasts The Denominators The Powerhouse of the Cell is the Mitochondria The Brain Cells The Creators Collective Family Group Chat Names All of My Bothers What time is dinner? People I Tolerate The Proud Family People I live with Keep up with the _______ Modern Family I Love You All, But... The Schuyler Sisters The Keys to My Heart The Incredibles What is the WiFi? Family Ties Sibling signals All in the Family We share genes Full House Beware of the Parentals Silly group chat names Codename: Kids Next Door The Mane 6 Chicks with Kicks Walkie Talkies Harry Styles' Fruit Salad Future A-Listers Not fast, just furious. The Real Drama Club Beyonce and Bed Bath A Pizza My Heart The Phantom Thieves SQUAAAAAAAAAAAAD The Game of Phones Area 51 Rolaskatox The Crystal Gems The Pokedex Good Times The Supremes Non-Stop Notifications I have a terrible idea The Karats Bubble Buddies Titans Organization 13 The Golden Girls 404 #Goals Let's Taco Bout it We Lit The Weekenders Learn more at: funny group chat names 1 Like
|
 What food processor does Ina Garten use? Most Italian gourmet restaurants and upscale cafes use the Ina Garten dishes as base dishes for their meals. These recipes were originally made by the wealthy in Italy and were passed down from generation to generation. Today, they are considered some of the most delicate dishes in the world. With these fabulous dishes comes the use of an Ina Garten machine. These appliances will prepare these gourmet Italian meals much more comfortably and quicker than if you were to do it by hand. There are several different types of these appliances that you can use. Some use a mixture of three main types of ingredients, while others will use one type. You can also find ones that use liquids and powders or powdered mixes to give them their added taste. The most common appliance is the rice bruschetta machine. This is a combination of a rice cooker, a grinder, and a pasta roller that will all create one easy-to-use appliance. It will take the rice out of the cooker and grind it to perfection. Then it will go into the pasta roller, and the ingredients for the rest of the meal will be evenly mixed. Another popular appliance is the vinaigrette grater. This is used to puree ingredients such as meats and vegetables. It will not only add a flavorful taste, but it will give your food a great texture. The use of a food processor for this process is ideal because it will create a puree that will taste good and be healthier than using a blender and a food processor. What Food Processor Does Ina Garten Dishes Use? Other appliances can be used for what food to prepare in InaGarten dishes. For example, there is a vegetable grinder. These come in handy when creating vegetable salads, soups, and other items that are more healthy than just using lettuce and tomato. When these machines are used, they can also be used to create fluffier foods like bread. A slicer is also something that you might find useful in what InaGarten dishes use as a food processor. Slicing things can be hard when it is just getting cut up. So, using a slicer can make things easier for you. There are several different types of slicers that you can use. Some of them are manual, which means you have to turn the blades manually, and some of them have a motorized blade that will slice faster and make it easier to cut things up. If you are looking for a simple way to make things more convenient, you might want to consider using a slicer. A mixer is also something that you can use with what InaGarten dishes use as a food processor. Mixers are used to make things a lot faster and easier to do, instead of spending your time chopping vegetables or adjusting the taste of sauces. You can use a mixer to do all of this for you. Besides, you can also use a mixer to make dough for your pancakes and use it to make salsas. You will need to have the correct attachments for each of these processes to get the best out of what you have. Conclusion: The final appliance that you can use with what InaGarten dishes use food processor is the can opener. The can opener is great because not only can you use it to seal cans. But you can also use it to store things as well. This can be a much better option than buying many different supplies to use for what you are making because sometimes you buy too much. Just use a can opener every once in a while, and it will surely save you money. If you are continually buying can liners and other supplies for your dinner parties, then this can be an excellent investment because it will last longer. Read more: Stand Mixer Food Grinder |
(1) (2) (3) (4) (5) (6) (7) (8) (9) (10) (of 10 pages)
(Go Up)
| Sections: politics (1) business autos (1) jobs (1) career education (1) romance computers phones travel sports fashion health religion celebs tv-movies music-radio literature webmasters programming techmarket Links: (1) (2) (3) (4) (5) (6) (7) (8) (9) (10) Nairaland - Copyright © 2005 - 2024 Oluwaseun Osewa. All rights reserved. See How To Advertise. 226 |